I’ve
always been one to focus on organization within the household for 2 main
reasons;
1—I
hope that my obsessive efforts will one day allow me to drop the title of “professional finder of all things for
everybody” that I hate so much and
2—it
helps keep things from being cluttered. I hate clutter. This is a purely
selfish reason that exists only for my neurotic alter ego.
Over
the years, I have gone from maintaining just a single bedroom with my parents,
to progressively upping the ante to the two-storey family home I am now
responsible for maintaining with a husband, two young offspring and a cat who
eats anything left out by the 4 year old or the baby (who also eats
everything). Anyone in my situation – and I trust there are a LOT – will understand
the chaos of this. Toys everywhere, diapers, wipes, bottles, school books and
tools from my “oh so handy” husband. Insanity, anyone?
So
here it is. My basic list of “rules” I have in my household that helps to make
my job slightly easier. I will warn you that some of it may seem a bit neurotic
to the average person. You WILL judge me, unless you are also type “A”, in
which case you may condone my actions, but just trust the process. The time
doing these will HIGHLY help your day to day life. You will find things with
ease. Things will remain in mediocre condition (you DO have kids, after all)
and we will one day *fingers crossed* drop that title. Here we go;
1)
Label things – Yes I
know. I warned you I would sound neurotic, but again, trust me. Label containers
in your pantry for “baking goods”, “medicine”, I even tape natural remedy
recipes to the inside of my medicine container. This can be used as a great,
easy reference. I also cut out the directions, precautions, or storage
requirements from the medicine boxes and label the back of them. This helps
still keep everything in place, but without the “bulk” of keeping all the
boxes. This same rule applies for organizing work places, home offices, or
other items such as batteries.
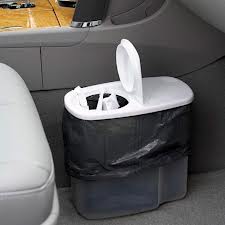
2)
Baskets, Baskets, Baskets
– I am a HUGE fan of the almighty basket (see picture below). Even though
inside the baskets may be a complete and utter chaotic mess, they help in my
home for a few reasons;
§
They keep the clutter from
being on top of the fridge, the kitchen table, the night stands – yuck!
§
I love the homey feeling they
offer and go great with any décor
§
They offer you a quick getaway
from the toys for those unexpected, or last minute visitors.
§
Out of sight, out of mind.
My baskets help me
keep things in place. Most of my baskets are for toys, some are strictly for
accessible diapers and wipes, some hold our vast array of cell phone bits,
chargers and batteries, and like I said, some are just a home for those odds
and ends everyone has around. Either way, invest.
3)
Sing it Loud, Sing it Proud – Let your
household know the “rules”. In my house, we follow basic principals;
§
If you use, you put it back
§
If you start something, you
finish it
§
All garbage goes IN the garbage
bin – it surprises me how many homes I have been into where this is obviously
not the case…
§
If you turn a light on, you
turn it off – not so much for organization, but saves us a few bucks come bill
time
My oldest is 4
years old and he knows and follows these. I’m not strict about it but it is
what it is…these are non-negotiable for my husband and I. You’re very welcome,
future daughter-in-law.
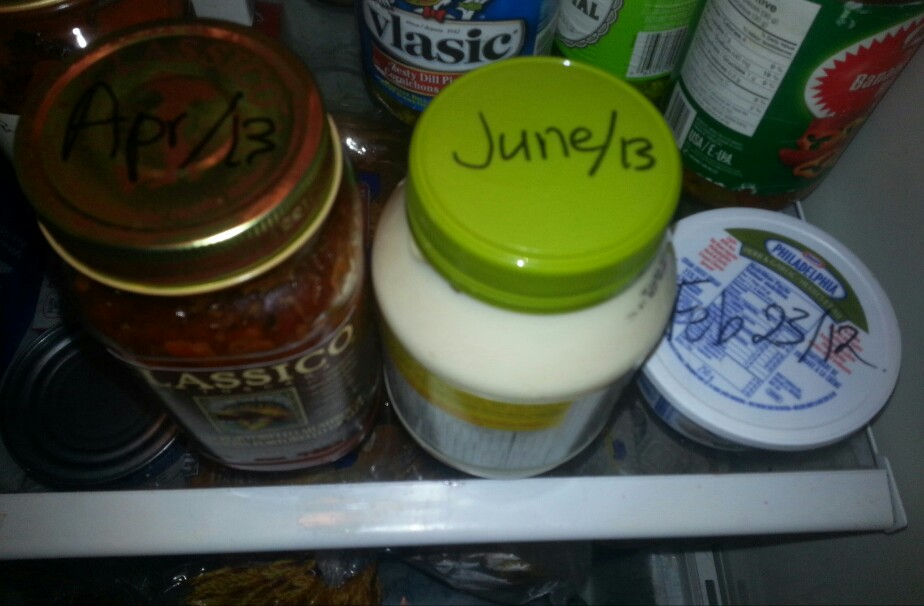
4)
Don’t second Guess Yourself – If you are
unsure that you put the lid back of the jar of pickles properly, just double check
it. You don’t want anyone to go and grab it later creating a huge mess for
someone else…but probably you
5)
Have Fun With It – None of this is to
encourage a stuffy household where things cannot be out of place. After all,
homes need to be lived in, not looked at. These are just some basic things I
have implemented in our home, so that the “work” aspect of maintaining the home
can be minimalized, allowing more time to enjoy life.
So now that I have given you some insight
as to what MY home is about, here are my suggestions for getting started. Apply
each principal to each project you tackle.
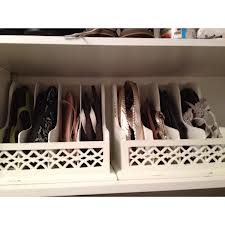
1) Start
small – Select one area of the home, on a “free” day of the week for you to
tackle. Let’s say, the front closet – check mine for example:
I used a basket I already had – surprise! –
to store all of our gloves, hats and mittens in the winter months, and
sunscreen, hats and umbrella’s in the summer months. I also purchased
inexpensive shoe organizers, dollar store coat hangers and it all just really
helps to keep things in their place. It may not be featured in House & Home
Magazine anytime soon, but it spares me the embarrassment of a clustered closet
when company visits.
2) Plan
– Think about how you would like things to be, and how accessible you want them.
Put a plan together for that particular area. If you are ever uncertain, I am a
gigantic fan of Pinterest. You will never be shy of ideas and tips for areas of
the home. Not sure how to organize all of your jewellery? Pots & pans?
Shoes? It will help you.
4) Don’t
Hoard – If it hasn’t been worn in 3 to 6 months, is ripped, broken, doesn’t
fit or no longer serves its purpose, throw it away, donate it or sell it.
Period, end of story.
5) Get
Creative – There are SO many great, DIY projects available to us now that
allows us to personalize everything and do it on a budget. My favourite!
6) Maintain
– Take a few minutes out of one day each week and tackle those odd ball tasks
around the house such as tossing the expired refrigerated items, or empty hairspray
bottles from the bathroom vanity. Remember, don’t hoard.
Even if it is not embedded in your natural
DNA, I truly do believe an organized home, is a happier home. It can help you
lead a more relaxed, less stressful day to day life and feel accomplished. I
just know you will enjoy your new found freedom when you release yourself of
the physical clutter in your home. You will sleep better, and maybe, just
maybe, you will find an extra hour at the end of your night for some you time!
Wishing you and your family the very best
of the Holiday season and cheers to a fresh beginning in 2013!
Miss Victoria J


.jpg)